Effortlessly Boost Your Internet: A Step-by-Step Guide to Setting Up Your New Wi-Fi Router
Effortlessly Boost Your Internet: A Step-by-Step Guide to Setting Up Your New Wi-Fi Router
Discover how to set up your new Wi-Fi router in minutes with our easy guide. Enhance speed, security, and coverage effortlessly. Perfect for beginners and tech-savvy users alike!
How to Set Up a New Wi-Fi Router: A Stress-Free Guide for Seamless Connectivity
How to Set Up a New Wi-Fi Router :

A reliable new Wi-Fi router is the backbone of your home network, powering everything from streaming to remote work. But setting it up can feel daunting if you’re not tech-savvy. Worry not! This step-by-step guide simplifies the process, ensuring you maximize speed, security, and coverage without hassle.
What You’ll Need
New Wi-Fi router
Modem (usually provided by your ISP)
Ethernet cable (included with most routers)
Power adapter
Smartphone, laptop, or tablet
Your ISP login details (if required)
Step 1: Unbox and Inspect
Start by unboxing your new Wi-Fi router and checking for essentials: the device, power adapter, Ethernet cable, and manual. Position the router in a central location, away from walls, metal objects, or appliances like microwaves to minimize interference.
Step 2: Connect to Your Modem
Power Down Your Modem: Unplug it for 30 seconds to reset.
Link Router to Modem: Use the Ethernet cable to connect the modem’s “Internet” port to the router’s “WAN” or “Internet” port.
Power Up: Plug in the modem first, wait 2 minutes, then connect the router to power.
Step 3: Access the Router Interface
Connect to the Router: On your device, open Wi-Fi settings and select the router’s default network (name and password are on the router’s label).
Enter the Admin Panel: Open a browser and type the router’s IP address (e.g., 192.168.1.1 or 192.168.0.1—check the manual).
Login: Use the default admin credentials (often “admin” for both username and password).
Pro Tip: Many modern routers offer mobile apps for setup—download yours for a streamlined process!
Step 4: Configure Network Settings
Update Firmware: Install the latest firmware when prompted for security and performance.
Name Your Network (SSID): Create a unique, recognizable Wi-Fi name. Avoid personal details like your address.
Set a Strong Password: Use a mix of letters, numbers, and symbols. Enable WPA3 encryption if available for top-tier security.
Enable Guest Network: Keep your main network secure by creating a separate guest network for visitors.
Step 5: Test and Optimize
Reboot the Router: Save settings and restart the router.
Check Connectivity: Connect devices to the new network and test speeds using tools like Speedtest.net.
Adjust Placement: If signals are weak, reposition the router or invest in a Wi-Fi extender.
Troubleshooting Common Issues
No Internet? Ensure cables are secure and the modem is online.
Weak Signal? Avoid obstructions or switch to a less congested Wi-Fi channel (2.4 GHz for range, 5 GHz for speed).
Can’t Access Admin Panel? Reset the router using the recessed button and restart setup.
Final Tips for Peak Performance
Frequent Updates: Ensure you check for firmware updates periodically to keep your device running smoothly.
Security Checks: Change passwords annually and monitor connected devices.
Reboot Monthly: Refresh your router to maintain speed and stability.
Setting up a new Wi-Fi router doesn’t require a tech genius—just patience and this guide! By optimizing placement, security, and settings, you’ll enjoy faster speeds, broader coverage, and peace of mind. No More Buffering: Enjoy uninterrupted browsing, streaming, and gaming with a seamless experience. Ready to conquer your home network? Your upgraded Wi-Fi experience starts now!
Revolutionary New Wi-Fi Router : Experience Seamless Connectivity Like Never Before!
Revolutionary New Wi-Fi Router: Experience Seamless Connectivity Like Never Before!new Wi-Fi router
In an era where our lives revolve around streaming, gaming, remote work, and smart homes, a reliable Wi-Fi connection is no longer a luxury—it’s a necessity. Enter the Revolutionary New Wi-Fi Router , a game-changing innovation designed to obliterate buffering, eliminate dead zones, and deliver unparalleled speed and security. Whether you’re a hardcore gamer, a binge-watcher, or a remote professional, this router promises to redefine your digital experience.
Why This Router Stands Out
Traditional routers struggle to keep up with today’s demands, often buckling under the pressure of multiple devices and high-bandwidth activities. The Revolutionary New Wi-Fi Router shatters these limitations with cutting-edge technology, offering features that cater to modern connectivity needs.
Key Features of the Revolutionary New Wi-Fi Router
1. Lightning-Fast Speeds with Wi-Fi 6E Technology
Harnessing the power of Wi-Fi 6E, this router operates on the uncrowded 6 GHz band, delivering speeds up to 9.6 Gbps. Stream 4K movies, download large files, or video conference without a hint of lag. The tri-band design ensures optimal performance by dedicating separate channels to gaming, streaming, and browsing, reducing congestion even in device-dense households.
2. Whole-Home Coverage with Intelligent Mesh Compatibility
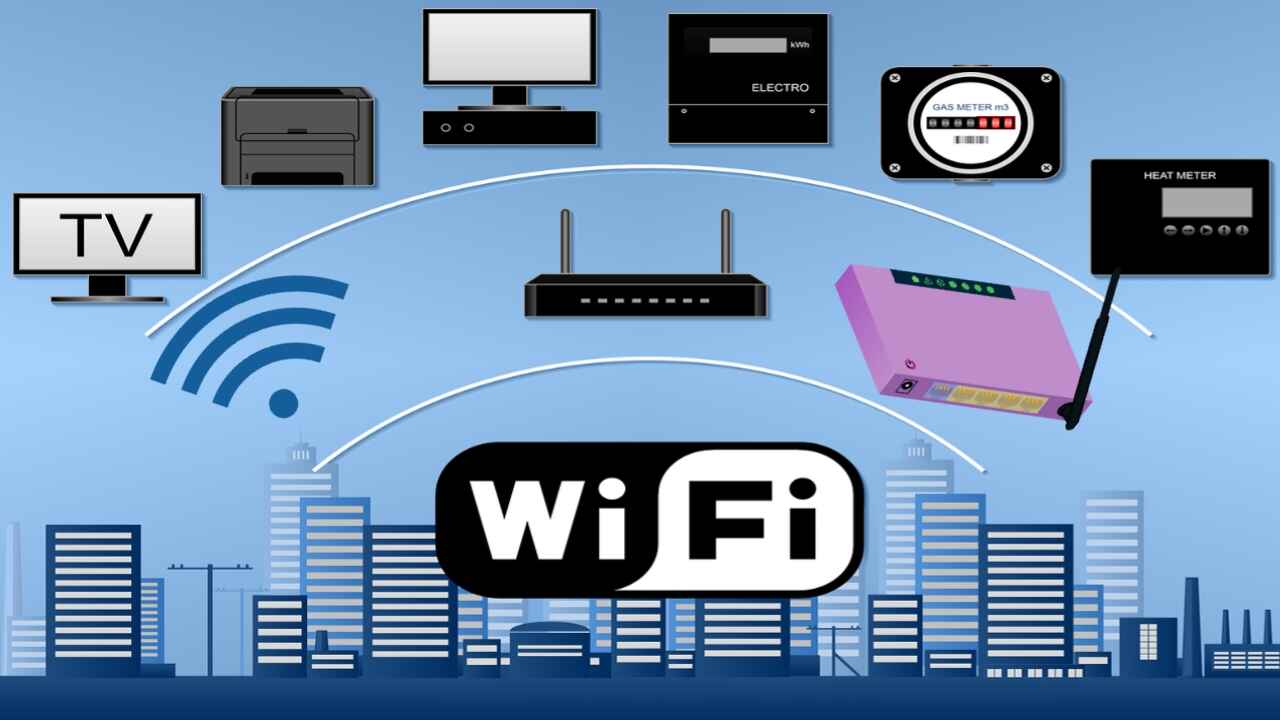
Say goodbye to dead zones. Advanced beamforming technology and high-gain antennas ensure every corner of your home receives a strong signal. For larger spaces, the router seamlessly integrates with mesh networks, creating a unified grid of coverage. Whether you’re in the basement or backyard, expect consistent, high-speed connectivity.
3. AI-Powered Network Optimization
This isn’t just a router—it’s a smart network manager. Built-in AI algorithms analyze usage patterns in real time, automatically prioritizing bandwidth for critical tasks like video calls or online gaming. It even detects and resolves interference, ensuring your connection stays stable during peak hours.
4. Military-Grade Security Protects Your Data
Cybersecurity threats are rising, but this router fights back. Equipped with WPA3 encryption, a robust firewall, and automatic VPN compatibility, it safeguards your data from hackers. Parental controls let you manage screen time and block inappropriate content, making it ideal for families.
5. Effortless Setup and Smart Home Integration
Gone are the days of confusing installations. A user-friendly mobile app guides you through setup in minutes. Plus, the router syncs effortlessly with Alexa, Google Assistant, and Apple HomeKit, letting you manage your network via voice commands or automate smart home devices without hiccups.
Who Needs This Router?
Gamers: Enjoy ultra-low latency and dedicated gaming channels for uninterrupted play.
Streamers: Buffer-free 4K streaming on multiple devices simultaneously.
Remote Workers: Crystal-clear video calls and secure connections for sensitive tasks.
Smart Home Enthusiasts: Connect 100+ devices without performance drops.
The Future of Connectivity Is Here
The Revolutionary New Wi-Fi Router isn’t just an upgrade—it’s a leap into the future. With its blend of speed, intelligence, and reliability, it addresses the pain points of modern internet users while staying ahead of evolving tech trends.
Ready to Transform Your Wi-Fi Experience?
Don’t let outdated routers hold you back. Upgrade to the Revolutionary New Wi-Fi Router and unlock seamless connectivity that keeps pace with your life.
How do i connect my alexa to a new wi-fi router ?
Seamlessly Connect Alexa to a New Wi-Fi Router: Quick & Foolproof Steps”
Learn how to connect Alexa to a new Wi-Fi router in minutes. Fix connectivity issues, optimize smart home performance, and enjoy uninterrupted voice control with this easy guide.
How to Connect Alexa to a New Wi-Fi Router ( Guide)
Changing your Wi-Fi router? No worries—connecting Alexa to the new network is simpler than you think. Follow these steps to ensure your Echo device stays online and ready to play music, control smart devices, or answer questions.
What You’ll Need
Your Alexa-enabled device (Echo, Dot, Show, etc.)
The Alexa app (iOS/Android) installed on your smartphone/tablet
New Wi-Fi network name (SSID) and password
Your smartphone connected to the new Wi-Fi network
Step 1: Prepare Your Alexa Device
Power On Alexa: Ensure your Echo device is plugged in and powered up.
Open the Alexa App: Make sure you’re logged into your Amazon account.
Step 2: Reconnect Alexa to the New Wi-Fi
Go to Devices:
Tap the Devices icon (bottom-right corner in the app).
Select Echo & Alexa and choose your device.
Enter Setup Mode:
Tap Change next to the Wi-Fi network.
Press and hold your Echo’s Action button (🔵) until the light ring turns orange.
For Echo Show: Swipe down, go to Settings > Wi-Fi, and follow prompts.
Connect to New Wi-Fi:
On your phone, go to Wi-Fi settings and connect to the Amazon-XXX network (temporary setup mode).
Return to the Alexa app, select your new Wi-Fi network, and enter the password.
Confirm Connection:
Wait for Alexa to say, “Your [device] is now connected.”
Troubleshooting Tips
Alexa Won’t Enter Setup Mode?
Unplug the device for 30 seconds, then retry.
App Doesn’t Detect Alexa?
Ensure your phone is on the new Wi-Fi network (not cellular data).
Restart the Alexa app or your phone.
Weak Signal?
Move Alexa closer to the router during setup.
Pro Tips for Success
Use the Same SSID/Password as Before?
If your new Wi-Fi router uses the same network name and password, Alexa may auto-reconnect. Still, manual setup is safer.
Update Alexa’s Firmware:
After connecting, say, “Alexa, check for updates” to ensure optimal performance.
Secure Your Network:
Enable WPA3 encryption on your router for better smart home security.
Final Checklist
✅ Alexa is in setup mode (orange light).
✅ Phone is connected to the new Wi-Fi.
✅ Correct password entered (case-sensitive!).
✅ Device firmware updated.
Need More Help?
Factory Reset Alexa: Press and hold the Action button for 25 seconds (light turns off, then blue). Set it up as a new device.
Contact Amazon Support: Use the Alexa app’s Help & Feedback section.
Enjoy Your Reconnected Alexa!
With your Echo device back online, ask, “Alexa, what’s the weather?” to test it. Now stream, shop, or control lights effortlessly—all powered by your upgraded Wi-Fi!
Akeem Listens Carefully as the Tech Support Person Explains How to Set Up His New Wi-Fi Router
Setting up a new Wi-Fi network can be an exciting yet challenging experience, especially for those who are not tech-savvy. Akeem, eager to get his internet up and running, listens carefully as the tech support representative guides him through the process. With patience and attention to detail, he follows each step, ensuring a smooth and hassle-free setup.
Unboxing and Connecting the Router
The first step in setting up any Wi-Fi network is properly connecting the router. Akeem unboxes his new device, ensuring all necessary components are included—such as the router, power adapter, Ethernet cable, and user manual.
Following the instructions, he:
Connects the router to the power source.
Uses the provided Ethernet cable to link the router to his modem.
Waits for the indicator lights to stabilize, signaling a successful connection.
The tech support person emphasizes the importance of placing the router in a central location, free from obstructions, to maximize coverage and signal strength. Akeem carefully positions the router to avoid interference from walls, electronic devices, and furniture.
Accessing the Router Settings
Once the router is powered on and connected, Akeem needs to configure its settings. The tech support expert instructs him to:
1. Open a web browser on his computer or smartphone.
2. Enter the router’s default IP address (usually 192.168.1.1 or 192.168.0.1) into the address bar.
3. Log in using the default credentials provided on the router’s label or in the user manual.
Upon accessing the router’s dashboard, Akeem sees several options for customization, including network name, password, and security settings.
Setting Up a Secure Wi-Fi Network
To protect his network from unauthorized access, Akeem follows these steps to enhance security:
Changing the SSID (Network Name): He selects a unique, recognizable name instead of the default manufacturer-assigned one.
Creating a Strong Password: Akeem sets a password that combines uppercase and lowercase letters, numbers, and special characters.
Enabling WPA3 or WPA2 Encryption: The tech support representative advises him to use WPA3 (if supported) or WPA2-PSK for robust security.
Hiding the SSID (Optional): For additional privacy, he disables SSID broadcasting so only devices that know the network name can connect.
Optimizing Wi-Fi Performance
To ensure optimal internet speed and stability, the tech support person provides Akeem with valuable tips:
Updating Firmware: Regular updates improve performance and security, so Akeem notes to check for updates periodically.
Choosing the Right Frequency Band: If his router supports dual-band Wi-Fi, he uses 2.4 GHz for wider coverage and 5 GHz for faster speeds.
Managing Connected Devices: To prevent congestion, he limits unnecessary device connections and prioritizes bandwidth for streaming and gaming.
Using Quality of Service (QoS) Settings: If his router supports QoS, he configures it to prioritize high-demand applications like video calls and gaming.
Final Testing and Troubleshooting
After completing the setup, Akeem tests his Wi-Fi connection by:
1. Connecting his smartphone and laptop to the new network.
2. Running an internet speed test to verify performance.
3. Checking for any connectivity issues.
In case of problems, the tech support person suggests rebooting the router, repositioning it for better coverage, or resetting settings if necessary.
With patience and careful listening, Akeem successfully sets up his new Wi-Fi router. By following expert guidance, securing his connection, and optimizing performance, he ensures a seamless internet experience. Now, he can enjoy smooth browsing, streaming, and gaming without interruptions.
Setting up a Wi-Fi network doesn’t have to be overwhelming—just like Akeem, anyone can do it with the right guidance and attention to detail
Guide for Seamless Connectivity New Wi-Fi Router
Setting up a new Wi-Fi router doesn’t have to be overwhelming. With the right steps, you can get your internet up and running quickly while ensuring optimal performance and security. Whether you’re a beginner or just need a refresher, this guide will walk you through the process effortlessly.
Step 1: Unbox and Connect Your Router
Before you start, ensure you have everything needed:
✔ Wi-Fi router
✔ Power adapter
✔ Ethernet cable
✔ User manual
How to Set Up the Hardware:
1. Choose the Best Location – Place the router in a central location, away from walls and electronic interference, to maximize signal strength.
2. Power Up the Router – Plug in the power adapter and turn on the router.
3. Connect to the Modem – Use the Ethernet cable to connect your router’s WAN (Internet) port to the modem’s LAN port.
4. Wait for the Indicator Lights – Once the lights stabilize, your router is ready for configuration.
Step 2: Access Router Settings
To configure your Wi-Fi, you’ll need to log in to your router’s admin panel.
How to Access Router Dashboard:
1. Connect a Device – Use a computer or smartphone to connect to the router via Wi-Fi (default credentials are on the router label) or an Ethernet cable.
2. Open a Web Browser – Type the router’s IP address (typically 192.168.1.1 or 192.168.0.1) in the address bar.
3. Enter Login Credentials – Use the default username and password (found in the manual or on the router) to access the settings.
Step 3: Configure Your Wi-Fi Network
Once inside the router settings, make the following essential changes:
1. Change the Network Name (SSID)
Go to the Wireless Settings section.
Rename the SSID to something unique and recognizable.
2. Set a Strong Password
Choose WPA3 (or WPA2-PSK) encryption for strong security.
Create a password using a mix of uppercase, lowercase, numbers, and symbols.
3. Optimize Frequency Bands (For Dual-Band Routers)
2.4 GHz – Offers wider coverage but lower speed.
5 GHz – Provides faster speeds with less interference.
4. Enable Guest Network (Optional)
If guests frequently use your Wi-Fi, set up a separate guest network to keep your primary connection secure.
Step 4: Optimize Router Performance
To ensure a seamless internet experience, follow these optimization tips:
✔ Update Firmware – Check for the latest firmware updates to improve security and performance.
✔ Position the Router Properly – Avoid placing it near metal objects, thick walls, or electronic devices that may interfere with the signal.
✔ Limit Connected Devices – Too many devices can slow down speeds; disconnect unused ones.
✔ Enable Quality of Service (QoS) – Prioritize bandwidth for high-demand activities like streaming or gaming.
Step 5: Test Your Wi-Fi Connection
1. Connect Your Devices – Ensure your phone, laptop, and other gadgets connect smoothly.
2. Run a Speed Test – Use a tool like Speedtest.net to check if you’re getting the expected speeds.
3. Fix Common Issues – If the connection is slow or unstable, restart the router, reposition it, or reset settings if necessary.
Final Thoughts
By following these steps, you can set up your new Wi-Fi router quickly and efficiently. A properly configured and optimized router ensures smooth browsing, streaming, and gaming without interruptions.
Ready to experience seamless connectivity? Get started with your Wi-Fi setup today!